Asian Pakistane Indian Recipes

Showing posts with label South Beach Diet Phase 2. Show all posts

Wednesday, May 14, 2014

Agave Almond Clumpy Granola | Breakfast Recipes

I love oatmeal. It is a wholegrain and a great way to start your day. I top it up with the fresh fruits I have at hand and just enjoy. But for DH, ordinary oatmeal is bleh. For him I have to pep it up a little, like making it as a granola. OK, Now I am not saying he is overly excited about the oats in the new form, but he doesn't complain. Mission accomplished!
I also sneaked in a little pressed barley to the oats. In a granola, it doesn't even make a difference. You should definitely try it.
Also check out my other granola recipes, Granola with pear puree and Pumpkin Cranberry Granola.
Ingredients:
Rolled oats / Old fashioned oats - 4 cups
Rolled (pressed) Barley - 1/2 cup (can substitute oats instead)
Raw whole Almonds - 1/2 cup - chopped roughly
Salt - a pinch
Light Olive Oil  - 1/4 cup
Agave syrup - 1/2 cup (Can substitute honey or maple syrup)
Vanilla extract - 2 tsp

Method:
Preheat the oven to 275 F/140 C. Line a large baking sheet with aluminium foil. Pulse 1 cup of oats in blender until fine. Mix the oats, barley (if using), oats flour and salt in a large mixing bowl. Whisk the wet ingredients separately. Pour the wet ingredients over the oats and mix well. Spread in the baking sheet and bake in the upper rack of the oven for 25 minutes. Remove from oven and mix once. Do not over mix as it may disintegrate the beautiful clumps which are forming. Just scrape the bottom of the foil all over. Pop in the oven again for 10 minutes. Remove and sprinkle the nuts. Place in the oven again for 10 minutes. Now, turn the oven off and leave the oven door ajar for an hour or two. When completely cooled, transfer to an air-tight container. Keeps well for weeks, if it lasts that long for you.
Notes: Play around with the flavours. Cinnamon, Cardamom, Ginger are nice alternatives or additions to the vanilla. You could add about 1/2 cup of your favorite dried fruits.
Careful though, if you have little kids running around, you may want to make this granola during their naptime since we do not want the curious little ones anywhere near the hot oven with door open.
Linking this up to Healthy Diets: Healthy Breakfasts event of Priya hosted by Nandoos Kitchen and to Srivalli's Come Join Us for Breakfast.

Thursday, November 7, 2013

Szechuan-Style Tofu and Mushroom with Peanuts | Vegan Chinese Recipes

For all the Tofu lovers out there, this recipe is for you. And for all the Tofu non-lovers you should really try this recipe once. Some think the taste of tofu is just bleh.. But honestly that attribute of tofu is what is really good in it. How? you may ask. Tofu absorbs flavors really beautifully no matter what dish it is used in. Bake it, Saute or Fry, it is always a winner. Make it spicy or make it tangy, it tastes awesome either way. I have a long list of dishes I use tofu in and love it in each form.

Ingredients:
Adapted from Cooking Light - way to cook Vegetarian cookbook
Serves - 2-3
Tofu - extra Firm - 1 block - pressed and cut into 1" pieces
Mushroom - 12 oz - 300 g - sliced
Carrots - julienned - 1/2 cup
Bell peppers (I used yellow and orange) - julienned - 1/2 cup
Roasted peanuts - 1/4 cup - coarsely chopped
Oil - 1 tbsp
Ginger paste - 1 tbsp
Spring onion whites - 1/4 cup
Spring onion greens - 1/4 cup
For the Sauce:
Water - 1 cup (Can substitute vegetable or chicken stock)
Corn Starch - 1 tsp
Chilli paste - 1 tbsp
Soy sauce - 1 tbsp (Low sodium)
Garlic - minced - 1 tbsp
Method:
Preheat the broiler and place the oven rack in the middle of the oven. Line a baking sheet with aluminium foil and grease with oil. Place the cut tofu pieces and broil for 10-12 minutes, turning once or twice in the middle. Mix the ingredients for the sauce and set aside. Heat oil in a large non-stick pan and saute the mushrooms. When the mushrooms start to release liquid add the carrots, green onion whites and ginger. After about a minute add the bell peppers, salt and fry for another minute. Add the sauce and allow to heat for about 2-3 minutes or until it begins to thicken. Add the tofu and spring onion greens, mix and remove from heat. Garnish with peanuts before serving. Serve hot with steamed rice.
Notes: Instead of broiling, the tofu can be pan-fried until golden.

Saturday, October 19, 2013

Chicken Soup for Cold / Kozhi Rasam | Soup Recipes

Last week my son was under weather with a severe cold. Poor thing was finding it difficult to concentrate on keeping himself busy with the nose block and congestion. All the vaporiser rubbing and steam sauna wasn't helping him much. So I made a simple chicken soup for him. This is a super comforting soup and if your little one can't bear the spicy heat, you might as well just mix this with rice and serve like rasam rice.

Ingredients:
Serves - 2
Chicken (with or without bones) - 1/2 lb (1/4 kg) approx 1/2 cup
Water - 2 cups
Pearl onions - 8
Garlic - 3 cloves 
Ginger - 1/2" piece
Pepper corns - 1 tsp 
Cumin seeds - 1/2 tsp 
Turmeric powder - a pinch
Salt - 1/4 tsp or to taste
Garnish:
Coriander leaves / Cilantro - a little
Method:
Crush the pearl onions and garlic cloves with knife. Crush the pepper corns and cumin seeds with a mortar & pestle or just with the bottom of a heavy glass. You could also pulse a couple of times in a blender or coffee grinder. Add all the ingredients in a medium saucepan. Cover and cook until the chicken is done. Alternatively you could pressure cook the ingredients for 1 whistle. Garnish with coriander leaves and serve piping hot.
Notes: 
Do not use chicken breast pieces for making soup. Half a tsp of cumin powder and coriander powder can also be added. I decided to keep it simple, so did not add.

Thursday, October 3, 2013

Peerkangai thol thuvayal / Ridge gourd Peels Chutney | Indian Chutney Recipes

Peerkangai / Ridge Gourd is a nutrient rich vegetable. Being brought up in a South Indian Family we were fed with a sumptuous share of vegetables for our meals. Dad always says vegetables from the vine are really good for health. Our mothers and grandmothers plan really very well on what vegetables can be cooked how. There was never any wastage of vegetables and if there are any leftovers they are promptly featured in a kootu or avial. Talking about the nutrients in the vine vegetables, this ridge gourd peels chutney always present whenever there is a curry, kootu or sambar is made with ridge gourd.
Ingredients:
Makes 1/2 cup of thogayal
Ridge gourd peels - 1 cup
Coconut - 2 tbsp
Urad dhal - 2 tsp
Tamarind - size of a marble
Red chilli - 2
Salt - to taste
Oil - 2 tsp

Method:
Wash and scrub the ridge gourd well. Using a knife scrape the sharp edges of the ridges. Peel the skin and reserve. Heat 1 tsp of oil and saute the peels until it starts to wilt. Remove and set aside to cool. Heat the remaining oil and fry the urad dhal, red chillies and tamarind. When the dhal begins to turn to light brown, add the grated coconut and remove from heat. Allow to cool and blend with the peels adding salt. The chutney should be thick, more like scooping consistency, so add only a little water while grinding as needed. Serve as a side for rice.
Linking this up for Vegan Thursdays.

Thursday, September 12, 2013

Brown Rice Pidi Kozhukattai / Brown Rice Dumplings | Indian Festival Recipes

No, I am still not done with the Ganesh Chaturthi recipes. I wanted to try my hands in making kozhukattai (kadubu) with brown rice and was successful this time. Even my hubby who is not a big fan of brown rice, liked it. As with most of my recipes this is a simple to make snack. This also is super healthy and tasty and now is going to feature more in my kitchen.
Ingredients:
Serves - 2; Measurements in 160 ml cup
Brown Rice - 1 cup
Water - 3 cups
Oil - 2 tsp
Grated Coconut - 1 tbsp
Salt - 1/2 tsp or to taste
Tempering:
Mustard seeds - 1 tsp
Urad dhal - 1 tsp
Chana Dhal - 2 tsp
Curry leaves - a few
Dry Red chillies - 2

Method:
Dry roast the brown rice in a tawa in medium heat. When the rice is warm to touch and lightly changed in color, transfer to a plate and allow it to cool. Pulse in a blender until it resembles the texture of rava (or bulgar). Heat oil in a non-stick pan and splutter the items under tempering. Add grated coconut, water and salt. Cover and allow the water to boil. When the water is boiling add the broken rice and stir continuously. Cook in medium heat, while still stirring, until most of the water evaporates and the mixtures comes together. Remove from heat and allow to cool down a little. When it is still warm, take lime sized portions and press with your fingers against the palm of your hands to make impressions of the finger. Steam in idli pan / bamboo steamer for 15 minutes. Serve hot with coconut chutney.

Linking these up to Kid's Delight - After School bites; Whats with my Cuppa 2 by Nupur; Healthy Breakfast.

Thursday, September 5, 2013

Homemade Granola with Oats, Nuts and Pear Puree

When I wanted to make granola at home I had no clue as to how and where to start. But one thing I had decided was not to use sugar and definitely use a fresh fruit puree. And there began my search for the best home made granolas. The recipes I came across had a lot of ingredients (I cannot say complex) while I had sworn to keep it simple. Needless to say those recipes had a pretty good amount of sugar added which is the whole point for me to make granola at home. Then I arrived at TheKitchn's website for the granola formula. It was very simple to understand..come on I had gone through loads of website with lots of ingredients and was totally lost. So out of the blue if you give me a formula (felt like I was in my chemistry lab again) I would be pleasantly surprised and happy. I gathered the ingredients and ta-da! Simple Home made granola!
Ingredients:
Makes 4 servings
Rolled oats - 1-1/2 cups
Almonds - 1/4 cup - chopped roughly
Pista - 1/4 cup - chopped roughly
Cinnamon - 1/4 tsp
Ground Ginger - 1/8 tsp
Ground Nutmeg - 1/8 tsp
Salt - 1/4 tsp
Pear - 1 medium sized - puree - approx 1/3 cup
Oil - 1 tbsp (any light tasting oil would work)
Agave nectar - 3 tbsp
Method:
Preheat the oven to 300 F. Mix the oats and nuts in a large bowl. Whisk the rest of the ingredients well and pour over the oats mixture. Mix well and spread on a parchment lined baking sheet (a 9x9 inch pan would be sufficient for this batch). Bake in the oven for 45 minutes mixing every 15 minutes. Allow it to cool for at least 30 mins, remember the granola hardens when it cools. So if the oats is still soft when you take it out of the oven, no worries needed as the granola becomes crispy after cooling. Serve with milk for breakfast or pack in a ziploc for a snack. Layer with fruits and yogurt for a parfait.. that is what I did!!
Linking this up for Vegan Thursdays. Also linking to Healthy Breakfast, Bake Fest by Vardhini, Srivalli's Kid's Delight - After School Bites.

Thursday, August 29, 2013

Pavakkai Podi / Bitter gourd Spice Powder for Rice

I am not generally an elaborate meal kind of person. A simple rice dish with a thovayal/rasam and a vegetable curry would be suffice. I will have a happy belly. This podi is one such recipe, from grandma which is a great make-ahead condiment and comes in handy for a quick, hot yet homemade meal. It can me made on a free weekend and stored in the fridge for a couple of weeks. It only really takes about 15 minutes of the stove time and you are good to go.
Ingredients:
Makes about 1/2 cup of podi
Bitter gourd / Pavakkai - 2 medium sized
Grated coconut - 1 tbsp
Dry Red chillies - 3
Garlic - 1 big clove
Salt - 1/2 tsp
Oil - 1 tbsp

Method:
Wash and pat fry the bitter gourd. Cut into half and core the center. Slice thin and cut into quarter. Add salt and let it set for about 30 minutes. Blend the coconut, chillies and garlic until ground well. Do not add any water while grinding. Drain the bittergourd pieces and squeeze the excess juice really well. Heat oil in a pan and fry in medium-high heat. When it turns light golden color, reduce the heat to medium and add the spice mix powder. Continue to fry until it takes a dry texture. Take care not to burn. Allow to cool and store in a dry glass container. To serve, mix couple of teaspoons of this powder with hot steaming rice and gingelly oil. Mmm... Heaven in a morsel...
Notes: This podi would not need any salt other than the one which was used for macerating. 
Linking this up to South Indian Cooking by Anu and Eat seasonal Food-Fresh by Jagruti.

Tuesday, July 16, 2013

Chicken Curry for Chapathi | Easy Indian Chicken Recipes

If you happen to be a chicken lover and a fan of chapathi, I bet you will love the combination of the duo. Don't you? I made a simple onion-based chicken curry with chapathi for lunch the other day. Pair it with a little cup of yogurt and you get a satisfying meal.
Ingredients:
Chicken breasts - 1/2 - about 1 cup 
Onion - thinly sliced - 1 cup
Tomato - 1 cup - chopped
Chilli powder - 1 tsp (use 3/4 tsp if need mildly spiced)
Turmeric powder - 1/4 tsp
Garam Masala powder - 1/2 tsp
Coriander leaves / Cilantro - a handful - chopped
Salt - to taste
Water - 1 cup
Oil - 1 tbsp
Method:
Heat oil in a kadai and fry the onions until golden brown. Add the chopped tomatoes with a pinch of salt and saute till it becomes soft and mushy. Add the spice powders and fry for about a minute. Add salt to taste with water. Check for seasoning and adjust if needed. Add the chicken pieces and mix. Cook in medium heat until the chicken pieces are cooked through. Since I used boneless chicken breast meat, it took about 5-7 minutes to cook through. Remove from heat, add the chopped coriander leaves and mix. Serve hot with roti/chapathi or any bread of your choice.

Wednesday, June 12, 2013

Sweet Potato Fry | Indian Side Dishes

Grandma used to make little dumplings with boiled sweet potatoes with grated coconut and ghee for use for evening snack. That was the only way I had sweet potatoes until I started cooking. I started incorporating it in parathas, baked chips with them and my recent favorite is this simple stir fry. It is a little on a sweeter side, so would make a good side for a spicy main course.
Ingredients:
Serves - 2
Sweet potato - 1 medium - cut into 1/2" pieces
Salt - to taste
Cumin powder - 1/2 tsp
Chilli powder - 1/2 tsp - 1 tsp (based on spice level)
Oil - 2 tbsp
Method:
Heat oil in a pan and add the cut sweet potato pieces. Mix and fry for about 10 minutes mixing occasionally. When a crust forms, add the spice powders and salt and continue to cook in med-high flame until it is soft on the inside and crispy on the outside. Mine took about 10 minutes after adding the spice powders. Serve as a snack or side.
Notes: It is good to cut the sweet potato into same size to help in even cooking

Thursday, June 6, 2013

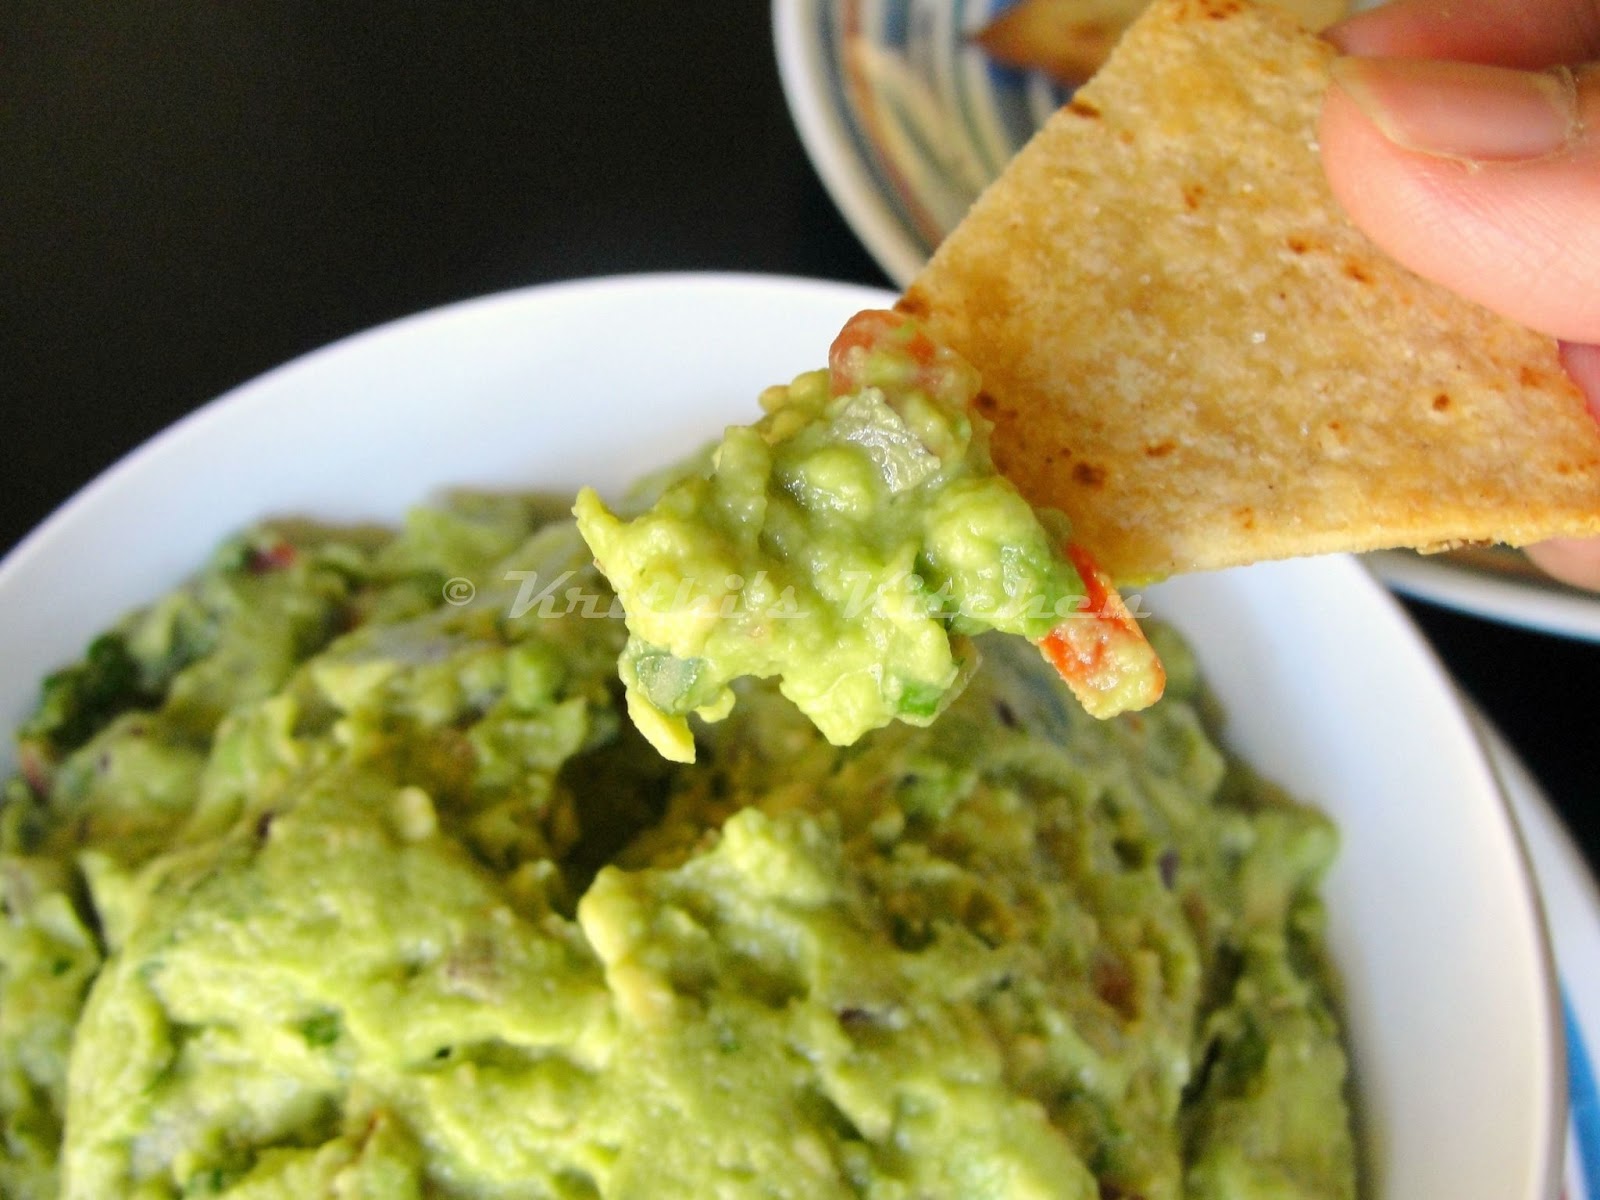
Guacamole

Guacamole is a favorite dip for chips or a yummy spread for bread/burritos and is an indispensable part of the Mexican cuisine. As a part of Vegan Thursdays this month here is a simple yet scrumptious recipe for guacamole. 


Ingredients:
Ripe Avocado - 1 big
Red Onions - chopped - 2 tbsp
Tomato - chopped - 2 tbsp
Jalapenos - chopped - 1 tsp
Cilantro - leaves from 4 twigs - chopped
Lime - 1
Salt - to taste
Method:
Cut the avocado lengthwise around the pit. Twist one half to separate the halves. Remove the pit with the help of a knife or spoon. Scoop out the flesh with a spoon and mash with a fork. Add the other ingredients and give a good mix. Keep covered with a plastic wrap in the refrigerator until ready to serve to avoid browning. 

Sunday, May 12, 2013

Mambazha Pachadi / Sweet & Spicy Mango Chutney | Indian Chutney Recipes

Mango season is here and the market is overflowing with mangoes. I picked up a few to try out a few recipes and to slurp it down as such, a simple wish of a true mango lover. When we were kids spending our summer holidays in grandparents' house in the village in India, we got mangoes in abundant. Literally, abundant in big baskets. We used to eat at least a few in a day. Summer holidays were all about, eating, playing and having fun. Also featured on the menu for the holidays would be raw mango rice, mango juice and pickles. I made this easy to make pachadi yesterday as a side dish for sambar rice. It tastes great with rasam and curd rice too.
Ingredients:
Ripe Mango - 2 large - peeled and cubed
Chilli powder - a large pinch or 1/2 tsp (based on spice level)
Salt - to taste
For tempering:
Oil - 1/2 tsp
Mustard seeds - 1/2 tsp
Cumin seeds - 1/2 tsp
Dry red chillies - 2 or 3, broken
Method:
In a saucepan add the mango pieces with salt and chilli powder. Add about 1-1/2 to 2 cups of water and cook covered in medium heat for 15 minutes. Stir occasionally by mashing the mango pieces to ensure that it doesn't stick to the bottom. When almost all of the water has evaporated, remove the lid and cook until the remaining water is vaporized. Remove from heat and allow to cool. For tempering, heat oil and splutter the mustard and cumin seeds. Add the chillies and pour this tempering over the cooled mango pachadi. Mix well and store in a dry, airtight container in the fridge. Keeps well for about a week, if it lasts that long for you.
Notes:
A pinch of turmeric powder can be added if desired. I did not add because i wanted the natural color of mango.

Sending this to Srivalli’sKid’s Delight event hosted by Pavani and to Mango Delights.

Monday, April 29, 2013

Whole Wheat Pita Chips

Every cuisine has its own variety of bread. Though I was used to Indian breads like Roti, Poori, Chapathi, Paratha, Naan, Kulcha I did not know there are so many other breads. My knowledge of non-Indian breads were limited to white and brown (wheat) breads until I came to know about many other varieties like foccacia, ciabatta, brioche.. well the list is endless. Being a hardcore foodie and a passionate food blogger I love to explore other cuisines and try out the dishes whenever I can. It was one fine day when I tried these Home made Pita Bread from Denny's space. May be I did something wrong with the measurements the first time, the dough was very loose and wasn't perfect. The next time I tried, the Pita came out perfect but it was the chips that was too thick and hard. Apparently I hadn't separated the layers before slicing to bake chips. And as they say "third time's the charm", this time both my bread and chips came out perfectly. The process is little intensive but when you taste these homemade beauties they are worth the effort.
For the Pita Bread
Ingredients:
Yield - 8
Whole wheat flour - 3 cups
Salt - 1 1/2 tsp
Extra virgin Olive oil - 1 1/2 tbsp + more for brushing
Honey - 1 tsp (can substitute sugar)
Active dry yeast - 1 pkt (approx 2 1/4 tsp)
Water - 1 1/2 cups
Method:
Whisk the flour and salt together. Add 1 1/2 tbsp of olive oil and mix together until it is well incorporated. Heat 1/2 cup of water until lukewarm. Add honey and the yeast. Mix and set aside to proof the yeast. When the yeast is frothy add this yeast mixture to the flour and knead to form a dough using the remaining water. Use water as needed to form a smooth pliable dough. Coat another bowl with oil and place the dough ball (coated with oil) and cover. Set aside in a draft-free space to rise. I set aside for 2 hours to fully rise to double the original volume.
When risen, punch down and form equal sized balls out of the dough. Cover with a damp cloth and set aside again to proof for 15 mins. Place a cookie sheet inside the oven in the center rack and preheat it to 500 F. In a rolling board, place one dough ball and roll to form a flat bread (about 6" diameter). Transfer to a plate and cover with damp kitchen towel until other balls are rolled out. Repeat for other balls. When the oven is heated, place one rolled out bread and bake for about 3 to 5 minutes or until puffed. Remove carefully with tongs and brush with some olive oil. Allow it to cool slightly before being served. Can be served as pita bread or pita pockets for falafel.
Notes for Pita Bread:
You may or may not need 1 1/2 cups of water. Use as required.
For good leavening, allow the dough to rise 3 times. One as a whole dough ball, second, after making small balls when the oven is preheating. Third, After rolling out the bread (a couple of minutes is good).


To make Pita Chips
Ingredients:
Serves - 2
Pita Bread - 2
Olive oil - 2 tbsp
Salt & pepper - to taste
Method: 
Preheat the oven to 400 F / 200 C. Line a cookie sheet with aluminium foil. When the bread is still warm cut it into two and gently pull apart the cut part to form a pita pocket. Use a knife to separate the pockets. Cut into wedges. One pita bread can be made as 16 or 12 wedges. Coat the wedges with oil, salt and pepper. Transfer to the cookie sheet and arrange so that the wedges do not overlap. Bake for 10-15 mins until slightly golden and crisp. Serve warm or in room temperature with hummus or any dip of your choice.
Sending this to Nayna's Flavours of Greece event; Made with Love Mondays; Swathi's Favorite Recipes event.

Monday, April 22, 2013

Chapathi Upma | Upma Recipes

This one is not much of a recipe per se, but an idea for a quick and healthy snack with leftover chapathi. If you want a colorful and healthy makeover for otherwise regular chapathi try this one. I also have another makeover recipe for chapathi which I will post soon. Now for the recipe.
Ingredients:
Leftover chapathi - 4
Onion - 1 cup - chopped fine
Green Bellpepper/Capsicum - 1/2 of a big one, any quantity of fresh vegetables can be added to make this dish more colorful and nutrient rich
Tomato - 1/2 - chopped fine
Oil - 1 tbsp
Mustard seeds - 1/2 tsp
Urad dhal - 1/2 tsp
Chana dhal - 1/2 tsp
Chilli powder - 1/2 tsp or to taste
Salt - to taste
Curry leaves - few (optional)
Method:
To reheat leftover Chapathi:
Wrap the chapathi in a wet kitchen towel and microwave for about 30 secs to a minute. Hot fresh chapathis ready.
Cut or tear the chapathi into small pieces. In a kadai heat oil and splutter the mustard seeds. Add urad dhal, chana dhal, curry leaves and onion. Saute until the onions turn soft and add the bell peppers. Fry for about a minute and add the chopped tomatoes with chilli powder and a pinch of salt. When the tomatoes are almost cooked add the cut chapathi pieces and mix until the vegetable mixture coats well on the chapathi. Serve hot for evening snack.


Sending this to Srivalli’sKid’s Delight event hosted by Pavani.

Friday, February 8, 2013

Beetroot Chutney | Chutney for Chapathi

When I was going through my posts I realized that I had not posted the Beetroot chutney until now. This is one of the staple dishes in my home and features atleast once a month when I make Chapathis. See, that is the case with certain dishes. We make them so often that we do not even think of clicking or sharing. This time I planned to click and post.
Ingredients:
Recipe Source: Aunty
Beetroot - 1 medium sized - grated
Grated Coconut - 1/4 cup
Shallots / Pearl onions - 5
Urad dhal - 1 tsp
Chana dhal - 1 tsp
Curry leaves - a few
Green Chilli - 1 or 2
Tamarind - a small piece (about size of half a blueberry)
Oil - 1 tsp
Salt - to taste
For Tempering:
Oil - 1 tsp
Mustard seeds - 1/2 tsp
Urad dhal - 1/2 tsp
Method:
Heat 1/2 tsp of oil in a pan and roast the urad dhal and chana dhal until they are light brown. Remove and set aside. Heat the remaining oil and add the green chilli and onions and saute until the onions are almost cooked. Add the curry leaves and the grated beetroot and fry until the beetroot is cooked through. Remove from heat and add the grated coconut and set aside to cool. Blend/Grind the beetroot mixture and dhal mixture until smooth. Add salt to taste and pulse for a couple of times. Heat oil for tempering and add the mustard seeds and urad dhal. When the mustard seeds pop, pour the tadka over the chutney and serve. This chutney is a great combo for chapathis or hot phulkas.
I am sending this to Pari's Only-Vegan event hosted by PJ this month.
[only%2520vegan%255B3%255D.jpg]


Friday, February 1, 2013

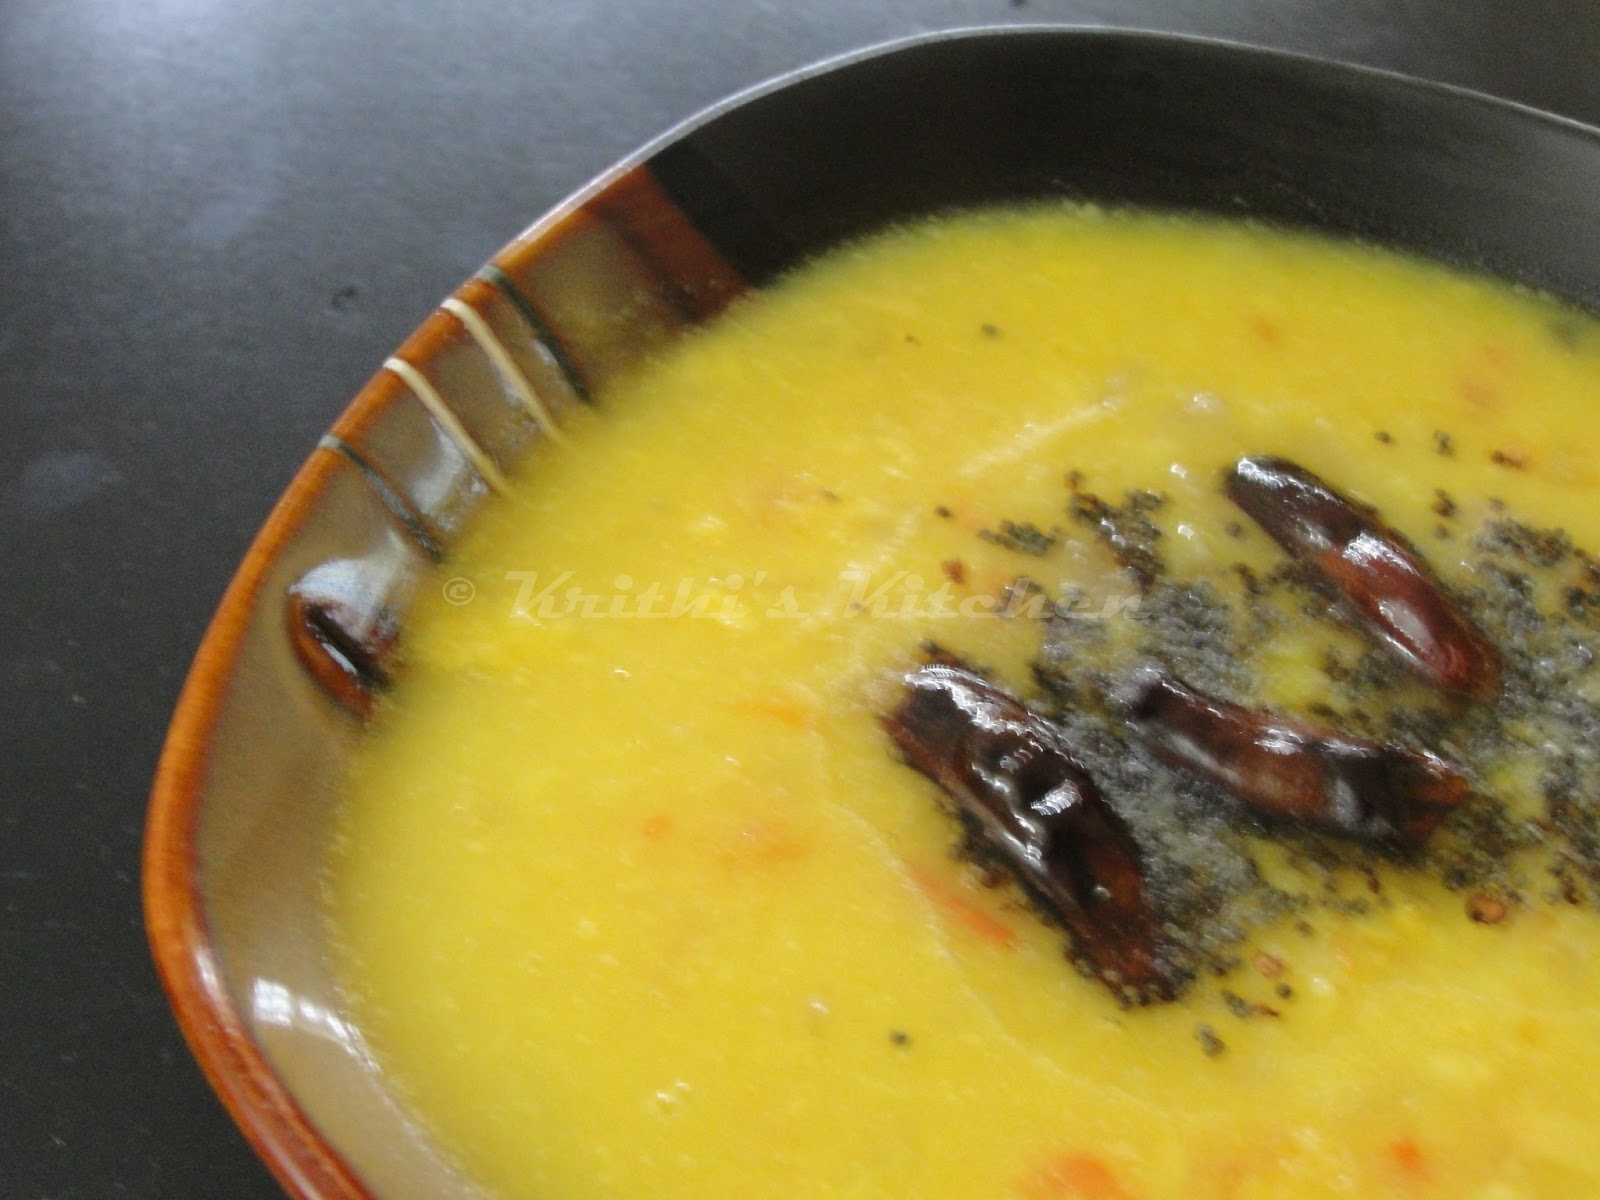
Simple Dal Tadka

When I have lot of chores to do on a weekend, I opt for this quickly done Dal Tadka. Paired with some spicy oven roasted vegetables (cauliflower/bitter gourd/tindora/potatoes) it is a complete meal which does not demand long time in the kitchen. Now, there are different ways to do a simple dal tadka and this is one of them. You can play around with the dhals used or the spices used and I bet it would turn delicious no matter what. What is your favorite combination?
Ingredients:
Moong Dhal - 1 cup
Onion - 1/2 cup chopped
Tomato - 1/2 chopped
Green chilli - 1 or 2
Turmeric powder - 1/4 tsp
Salt - to taste
Water - 3 1/2 cups
Ginger - 2 tsp - minced
Garlic - 1 tbsp - minced
Oil  - 1 tbsp + 1 tsp
For Tadka:
Mustard seeds - 1/2 tsp
Cumin seeds - 1/4 tsp (optional)
Dry red chillies - 2
Curry leaves - a few (optional)
Method:
Pressure cook moong dhal with a dash of salt, turmeric powder and water (about 3-4 whistles). When done mash with the back of a spoon. Heat oil in a kadai and saute the onion. After a couple of minutes add the minced ginger, garlic and slit green chilli. Saute for 2-3 minutes and add the tomato. Saute with a pinch of salt until the tomato turns mushy. Pour the onion-tomato mixture over the dhal and simmer in low heat until the flavors meld, about 10 minutes. Remove from heat. Heat 1 tsp of oil in the same kadai and add the ingredients for tadka. When the mustard splutters, pour over the dhal. Serve hot with rice/roti and ghee (if desired). Pair with a spicy side dish for a complete meal.
Note: 
1. The ginger and garlic have to be fresh and minced. The paste would not work here.
2. A combination of different dhals can be used viz toor dhal, chana dhal, masoor dhal.

Tuesday, January 22, 2013

Mushroom Asparagus (crustless) Mini Quiche

Do you want something quick for a busy mornings and do not want to stand near the stove cooking some dosas or oatmeal. Then these mini quiches are for you. These simple to make (bake) dish has all the goodness you need for the morning to keep you going until lunch. Eggs for protein, Milk and Cheese for Calcium and Mushroom and Asparagus adds up to your daily serving of vegetables for the day. Score!
Ingredients:
Serves - 4
Eggs - 6
Low fat Milk - 1 1/2 cups (360 ml)
Mushroom - 6 oz pkt
Asparagus - about 6 to 8 spears
Salt - 1/2 tsp or to taste
Pepper - 1/2 tsp or to taste
Grated Cheddar cheese (reduced fat) - 1/3 cup or as needed
Method:
Preheat the oven to 350F / 175 C. Spray a 12 cup muffin tin with oil.
Slice the mushrooms and saute in a pan with little oil until all the water evaporates. Drain on a paper towel. Saute the asparagus similarly until it is almost cooked. Whisk together the eggs, milk, cheese, salt and pepper. Add the vegetables and mix well. Pour carefully into the greased muffin tins until full. Bake for 30 mins or until the knife inserted into the center comes clean. Cool in the muffin pan for 15 mins. Remove carefully with a spoon and place in a plate lined with kitchen towel until cooled completely. Transfer to a ziptop bag and pop into the top shelf of the refrigerated and pull out as desired. Reheat in the Microwave for about one minute or as desired.
Alternate layering:
Divide the cheese into two and layer the bottom of the cups with half of the grated cheese. Layer the vegetables above the cheese. Now pour the eggs-milk mixture into all the pans until full. Now sprinkle the remaining (reserved) cheese over the pan equally. Bake like the method above.

Linking these beautiful mini quiches to Let's Cook - Healthy Breakfast; Mission - Breakfast; Breakfast Club.

Saturday, May 26, 2012

Chicken Chukka / Easy Indian Chicken Side Dish | Indian Chicken Recipes

This is the first non-veg dish in my space, though I used to eat meat at least twice a month before marriage. My family, Grandma, Dad and Sis are experts in cooking meat and I had been always a sous-chef whenever it comes to cooking non-veg. My territory was limited to the prepping and tasting area. DH is a pure vegetarian. Having said that, I never really had an idea to cook meat at home until recently. I started with salmon initially and slowly included chicken in my kitchen. I have started with cooking basic recipes, nothing fancy and hoping to post more non-vegetarian recipes here in my space. 
Ingredients:
Preparation time - 10 mins; Cooking time - 15 mins
Serves - 2; Spice level - Medium
Chicken Breast - Boneless, Skinless - cut into 1" cubes - about 1 cup
Oil - 2-3 tbsp
Curry leaves - 4
Pearl onions / Shallots - 10 - chopped roughly - 1/2 cup or more, the more the tastier..
Tomato - chopped - 2 tbsp
Ginger Garlic paste - 1 tsp
Curry powder / Kari Masala Powder - 1/2 tsp
Pepper Powder - 1/2 tsp or to taste
Red chilli powder - 1/4 tsp or to taste
Turmeric Powder - a pinch
Salt - to taste
Method:
Heat oil in a pan and add curry leaves. When it splutters add the pearl onions and fry until it becomes light brown. Add tomato and a little salt and saute until it becomes mushy. Add ginger-garlic paste and cook for 2 minutes. Now reduce the heat to medium and add the spice powders, curry powder, pepper powder, chilli powder and turmeric powder with salt to taste. Fry for a minute, add the chicken and mix well. Cook in medium high heat for about 6-8 minutes or until done, mixing occasionally. Serve hot as a side dish.
Note: To check doneness, prick and split with a fork. If you want a more gravy like dish increase the amount of tomato and add half a cup of water at the end and boil for 5 minutes.
I am sending this simple Chicken dish to Chicken Feast event by MySpicyKitchen.
Chicken Feast, myspicykitchen, my spicy kitchen

Friday, April 6, 2012

Spinach Broccoli Cream Soup | Soup Recipes

I am trying to include Spinach to my diet atleast twice or thrice a week. But I get bored with the regular Spinach with dhal curry. So I am trying many ways to include spinach which is interesting too. Spinach chapathi, Spinach basil pesto, Spinach chutney are few of the many ways I try them. The recent addition to the list is this Spinach Broccoli cream soup.
Ingredients:
Serves -2
Fresh baby spinach - 2 cups - tightly packed
Broccoli - (fresh/frozen) - 1 cup - steamed
Chopped onions - 1/2 cup
Garlic - 1 clove - halved
Vegetable stock - 2 cups - Homemade or Store-bought
Cooking cream - 1/4 cup (optional)
Pepper powder - 1/2 tsp or to taste
Salt  - to taste
Olive oil - 1 tbsp
Method:
In a wide sauce-pan heat olive oil. Saute the onions and garlic until it becomes soft. Add the steamed broccoli and fry for a minute. Add the spinach and saute until it wilts. Add pepper and the vegetable stock. Allow it to boil and remove from heat. When it is slightly cool, puree in a blender in batches or using an immersion blender. Return the puree to the sauce-pan and heat slightly. Add the cream and whisk until it is well mixed. Add salt to taste but remember the store-bought stock may already have salt in it. Remove from heat and serve warm or cold. It tastes good either way.
Sending this healthy and tasty soup to Healthy Morsels - Pregnancy and also to CC-Spring Seasonal Food.

Twitter Delicious Facebook Digg Stumbleupon Favorites More